
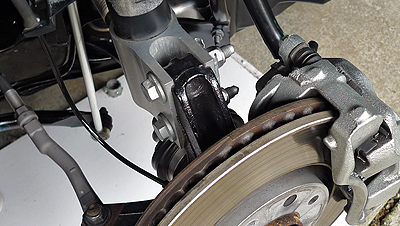
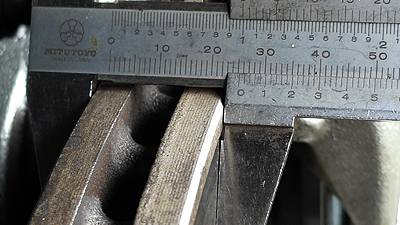
The braking system on the Ford Explorer 4X4 makes use of hydraulics to slow and stop the vehicle. When you push the brake pedal with your foot, the master cylinder is activated, and it pushes fluid through the brake lines to the calipers. The brake calipers then squeeze the rotors between them and the friction causes the Explorer to slow down and stop. The friction causes the brakes and rotors to wear and when the rotors reach the minimum thickness of 0.810 inches, you must discard and replace them.
Instructions
- 1
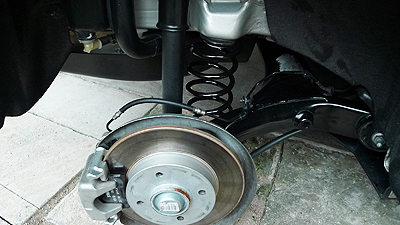
Park the Ford Explorer on a level surface and turn off the key. Put the wheel chocks behind the rear tires of the vehicle. Lift the Explorer with the automobile jack. Place a jack stand under it close to the jacking point and raise it to the frame.
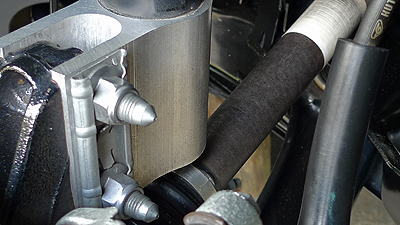
2Remove the lug nuts from the wheel with the lug wrench and pull the tire from the Ford. Loosen the caliper bolts with a socket and ratchet. Pull the caliper from the mounting bracket and secure it to the strut with a wire tie. If you allow the caliper to hang, it will damage the brake hose.
3Carefully pry the grease cap from the wheel hub using the screwdriver. Remove the cotter pin from the shaft using the pliers. Remove the locking nut using a wrench. Remove the adjusting nut using the wrench and then pull the flat washer from the shaft.
4Remove the outer bearing cone and roller assembly from the hub. Be careful not to drop the bearings. Remove the hub and rotor assembly from the spindle.
5Install the new rotor along with the hub assembly. Insert the roller assembly and the bearing cone. Pack the bearings with wheel grease. Slide the flat washer on the shaft. Install the adjusting nut and tighten it with a wrench. Install the lock nut and tighten it with a wrench. Install a new cotter pin and spread it open with the pliers.
6Place some wheel grease over the assembly and carefully tap the grease cap into place with the rubber mallet. Cut the wire tie holding the caliper to the strut with the pliers. Place the caliper into the mounting cradle and tighten the locking pins with the socket and ratchet. Install the wheel on the Explorer and tighten the lug nuts with the lug wrench.
7Remove the jack stand from under the Explorer and lower the vehicle to the ground. Repeat the procedure on the other wheel. Pump the brake several times when the project is complete to be sure that the brake pads bare resting on the rotors.


 The particularly feline looking front headlights extend harmoniously along the bonnet profile. Four “circular lights” with an attractive technical finish give the vehicle a “look” that is both bright and eye catching, and are clearly visible through the clear headlamp lense.
 The profile of the 308 creates a dynamic impression of movement, with elaborately styled panels and flowing design of the windows. The lines at the rear of the vehicle help to identify it. The large wrap around lower bumper – and large rear lights emphasises the wider rear profile and the large curved rear tailgate glass.
 The interior style of the 308, exploits as far as possible the space made available by the semi-tall architecture. The objective is probably to give the interior a very prestigious feel, both in terms of the design and the materials used.


 Could someone please tell me how the add-on colorful grounding wire with 12mm. sq. copper strands inside can improve grounding while there are already physically connected by massive conductor through out engine, chassis and body?
 Improve sparks? Not quite. Sparks carry a few milliAmps only. The high potential electrons can jump across the gaps. Wire size doesnt matter. The conductance/conductivity is not an issue. In fact the HT lead insulator resistivity is MORE important than the x-section area through which the electrons flow - to prevent sparking occur other than at the spark-plug gaps.


